How to sew a summer bag from jeans belts
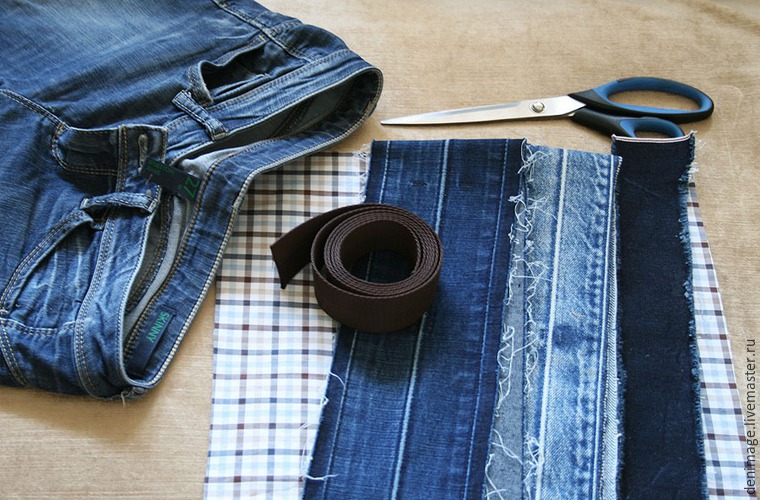
We need fabric for a shirt which will form at the same time a basis for a nashivaniye of jeans strips and a lining; a sling for handles and jeans strips.
If you have enough patience, then it is possible to unstitch belts at couple джинс using for this purpose the razor - it is long, but very meditative process, helps to relax after mad day). After washing and an ironing of a belt of jeans are incredibly beautiful show attrition, transitions of color, a fringe on edge... The fact that it is necessary to us!
We cut out 2 rectangles of the necessary size from fabric. At me about 35 x 35, but is possible more. We put the washed and ironed jeans belts on this basis.
Spaces between belts we fill with strips jeans and we pin pins. The more shades blue you use — the more beautifully. We alternate dark and light strips. If there is no rather long whole piece, it is possible to make it from 2 or more. We chop off strips pins. We sew along edges on the sewing machine.
Rear view.
The more longitudinal seams we will make, the design will be more reliable :)
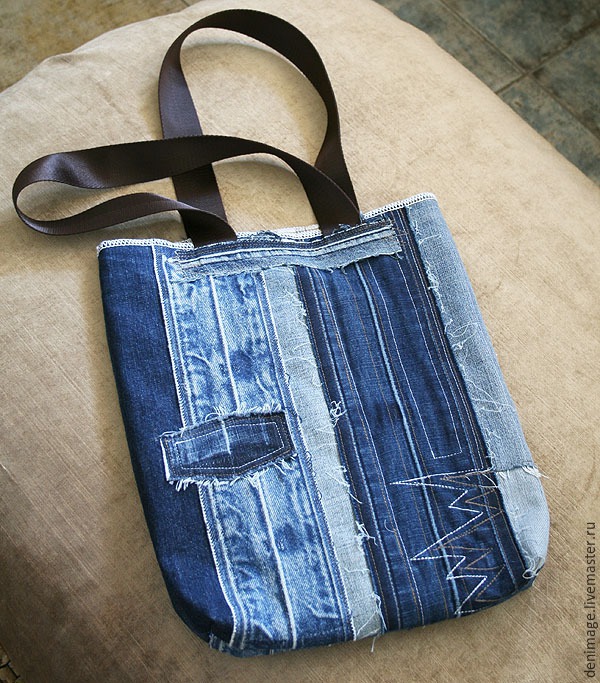
For decorative effect, we will add a string of one more color, we will make a decorative stitching in the form of a zigzag and we will sew a small patch horizontally.
We do the same with the second part of a bag.
We sew a pocket from 2 rectangles of fabric, in finished form it is 14 x 20 cm.
We sew a pocket on one of the parties. Also we do a seam in the middle that 2 pockets have turned out.
Lines will be visible on outer side of a bag, and it is good. The main thing that they were accurate, and threads on the ends of seams have been cut off at the roots.
Pockets are sewn.
The upper edge of the bag can be processed on an overlock, this will also add decorativeness.
Now we put both parts of a bag and we cut out at bottom edge on both sides of 2 small squares about 4,5 x 4,5 cm. It will help to make a bottom at a bag.
Further we sew a bag on 3 parties.
We loosen the seams and work on the overlock.
If there is no overlock, you can process the seams "zig-zag".
Now it is necessary to sew bottom corners of a bag. For this purpose puts side and lower seams together where we cut out squares. Has to such corner will turn out.
We process a seam.
When we turn out a bag, such bottom will turn out.
It was necessary to sew bag handles. From slings we cut out 2 details about 60 cm long. We put them on a front part of a bag, from above we put horizontally long rag it is desirable with a torn edge and we fix pins.
Now it is necessary to stitch fabric diversely that handles of a bag kept reliably.
The bag is ready. Now — in park / shop / on the beach — the bag is useful everywhere.
Success in creativity!


Nice bags. Thank you
ReplyDeleteThank you so much for this tutorial, very useful for me now
ReplyDeleteNice handbag - I thought that I was the only one that removes the waistbands (and back pockets too). I have a ton of them. I will try making the handbag!
ReplyDeleteThank you. Will make this bag very soon as I have an old washed pair of jeans and an old discarded leather belt
ReplyDelete