
Quilted Laptop Bag Tutorial with Free DIY Instructions. Just to recap, at this point you should have Part 1 complete along with the corded handles complete. If you don't, click the links and get to work....come back when you have those done!
Here we go!
WHAT YOU NEED:
Two (2) main quilted pieces, one with the pocket attached (from Part 1)
22"-24" zipper
Corded Handles (optional)
STEP 1: Attach the Zipper
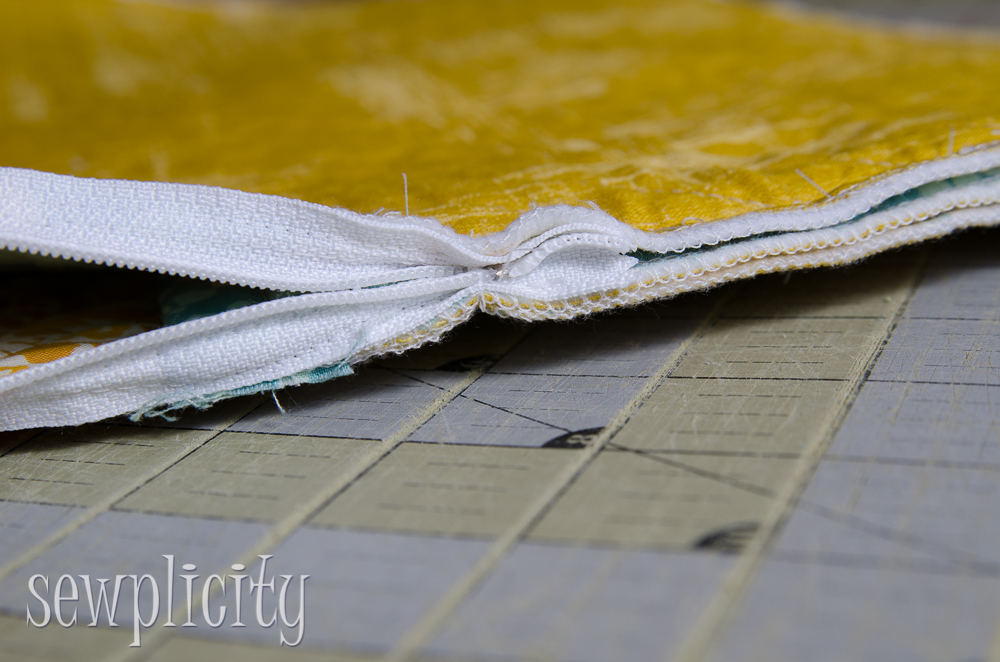
Grab your zipper and the front piece of the laptop case (the one with the pocket). Place your zipper foot on your machine.
Place this piece face up on your work table. Find the center of your zipper and mark it, also mark the center of the top of the main piece. Place the center of the zipper FACE DOWN on the center point of the main piece. Be sure the raw edge (top) of the zipper is lined up with the raw edge of the main piece. Pin in place. Continue pining the zipper along the raw edge and around the sides.

As you turn the corners, you will want to clip into the zipper tape to make the turn easier, but be careful, you don't want to clip in too far....leave space to sew, you don't want the clip marks to extend past your seam line.


Once you have the zipper pinned in place, use your zipper foot to carefully stitch in place.

Take extra time sewing around the corners. You may need to maneuver the fabric a bit as you work through this section.

Flip the zipper back, use a pair of small scissors and clip any excess fabric away from the back of the zipper in the corners.

Close the zipper up if it's open. Lay the zipper FACE DOWN on top of the other main piece which should be FACE UP on your table. Just as you did before, pin in place. This time it may be a bit more difficult since the other main piece is attached, but you can do it!

Sew in place using your zipper foot. Remember, take your time with those corners...this time it is going to be a bit more tricky....

Once again, clip any excess fabric close to the stitch line.

If you open up the zipper if it is easier to work with.

If you haven't already, open you zipper and press with a hot iron. Be sure to press the raw edges under so your zipper lays flat. You can now top stitch around the case, about 1/8" from the zipper. Try to get the back seam in that stitch so it is secure and won't pop up later.

Here is a look at the lining side of the case after the top stitch.

And here is what the top stitch looks like from the front.

STEP 2: Sew the Case
Now that your zipper is installed, let's close up the bottom. Flip your case inside out and close your zipper 1/2 way (you will need it open enough so you can turn it right side out later). Pin the bottom and open sides together.

Start sewing your seam (using a 1/4" seam allowance, if you need to you can increase that a bit, but keep it as small as possible) about 1" in from the edge of a zipper tape end and continue down and around the bottom to about 1" past the start of the zipper tape on the other side. Your stitch line is going to OVERLAP the ends of the zipper.

Here is a diagram that will show you the overlap of the zipper and the stitch starting place:


Now go back and stich across the seam allowance horizontally to secure the ends of the zipper. Backstitch at start and finish. Do this on both sides.


After you sew across the seam allowance, the edges will be pinched together like below.
Turn your laptop case right side out and test to make sure your laptop fits!

At this point you have a completed sleeve. You can stop here if you want or continue to Step 3 to add handles.

STEP 3: Add the Handles
Grab the handles you have already made (or go ahead and make them). You can find the tutorial handle HERE.

Trim off the edges of the handles to ensure they have a perfectly straight edge.

Find the center of the top of your case. Measure out from the center 2" on both sides and down 3/4". Mark with a pencil.

Place the inner corners of your handle edges on those marks and pin in place. NOTE: The back of the handles will be facing UP and the curve of the handle will for a "U" shape.

Sew a scant 1/4" seam to across each edge of the handle bottom.

Flip the handle over and sew a 1/4" seam across the top of the handle edge as in the picture below.

Pin to hold in place.

Secure the handle by sewing a square on the inside of the tabs. This will end up being about 1" square.

Repeat for the handle on the other side.
YOU ARE FINISHED!


Quilted Laptop Bag Tutorial (Part 1) HERE


0 comments:
Post a Comment