
It's a nifty little pattern for a wrap which holds all kinds of favorite art supplies. Each wrap can hold a notepad, crayons, pens and a Dover little book or any small sized activity book.

They are much beloved by my own children who have, at last count, three each. I have been giving lots of them as presents this year and they've been a big hit.
I keep a couple in my car and one in my handbag and I use them all the time. They have saved my sanity more than once while waiting at a restaurant for a meal to arrive. They are a breeze to make and are completely addictive.

You will need:
• Fabric for cover measuring 8" x 19"
• Fabric for lining measuring 8" x 19"
• Flannel fabric for interfacing measuring 8" x 19"
• Fabric for pocket measuring 9" x 19"
• 2 pieces of twill tape measuring 18" long
• Rotary cutter and mat and/or scissors
• water soluble marker, tailors chalk or marking pencil
• Pins, thread
• Iron
• This wrap will comfortably hold the following but can fit a variety of different supplies:
1 pack crayons (Crayola 24 pack or smaller) OR 12 pack pencil crayons, 4 pens, pencils or pencil crayons, 1 Dover Little Activity book or small sticker book, I small scratch pad 4" x 6" or smaller. (See notes on supplies at end).
1. Cut fabric as directed above.

2. Making the pocket. Fold pocket fabric in half width ways so it measures 4.5” x 19”. Press and topstitch along folded edge. This will be the top of the pocket.

3. Assemble the wrap as follows: bottom layer is the flannel, then the lining right side up,
then the pocket right side up.

Carefully place twill tape lengthways above pocket with ½” protruding from the end.

Finally, place cover over the three layers, right side down, being careful not to disturb the twill tape.
4. Pin around perimeter, leaving a 3” gap at top and making sure to pin twill tape in place. I also pin the middle of the twill tape to prevent it getting caught in the edges.


5. Using a ¼” seam allowance, begin sewing at one end of gap. Stitch around perimeter, except for 3” gap. Reinforce stitches at beginning and end of gap and over the twill tape.

6. Trim corners and ends of twill tape. Then turn wrap right side out through 3” gap.


7. Press gap with ¼” fold under and using a slip stitch hand sew gap closed.


8. With pocket side facing up, mark out pockets using a water soluble marker, tailors chalk or marking pencil. Starting at facing left hand side mark as follows:

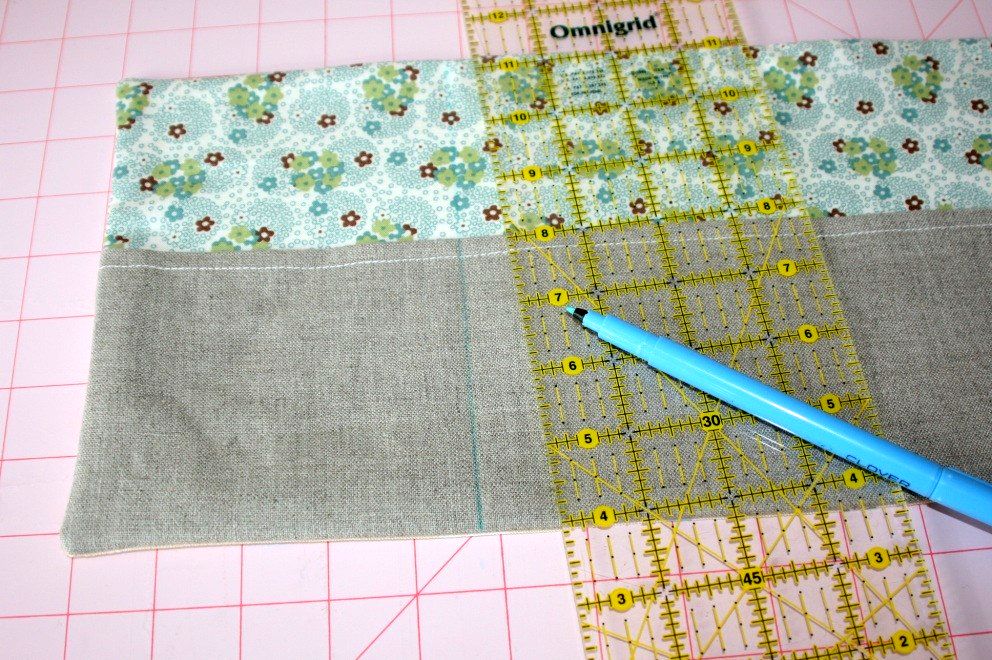

9. Pin to secure pockets. Stitch along marked lines. Trim threads and press.

10. Remove markings, fill with art supplies and you’re done!


0 comments:
Post a Comment