
Love to exercise, but don’t want to wear arm band in order to listen to your favorite music? This phenomenal little belt will eliminate all of the arm slippage, and make running while listening to music a breeze!

I have a love/hate relationship with running. On one hand, it’s healthy and good for you. On the other, it’s hard.
To help make the time (and me) go a little faster, I like to listen to music. I’ve tried running with my iPhone in one of those arm band things, but they don’t usually stay on my non-bulging biceps and I just end up resorting to tucking my phone into my sports bra (gross, I know). After seeing some running belts on much faster runners back at a race in the spring, I decided it was a genius solution and that I needed one. Not wanting to shell out the big bucks for it, I figured I could easily make one! This running belt is perfect for holding your phone, keys, and your ID.


Here’s how to make one…
Materials
1/4 yard of Spandex or Nylon Fabric
7 Inch Zipper
Fold-Over Elastic (FOE)
Stretch Needle
General Sewing Supplies
Instructions
Measure your waist or hips, depending on where you want to wear your belt, and cut your fabric to that length. You are going to want the belt to be snug, so it doesn’t bounce around when you run.

Next, place the zipper and the fabric centered, right sides together with the tops aligned and pin in place. I centered my zipper, but you could put it anywhere.
Using a stretch needle and zipper foot, stitch close to the zipper teeth. Then, turn the fabric over and top stitch. This will help prevent the fabric from getting caught in the zipper teeth when opening and closing the zipper.
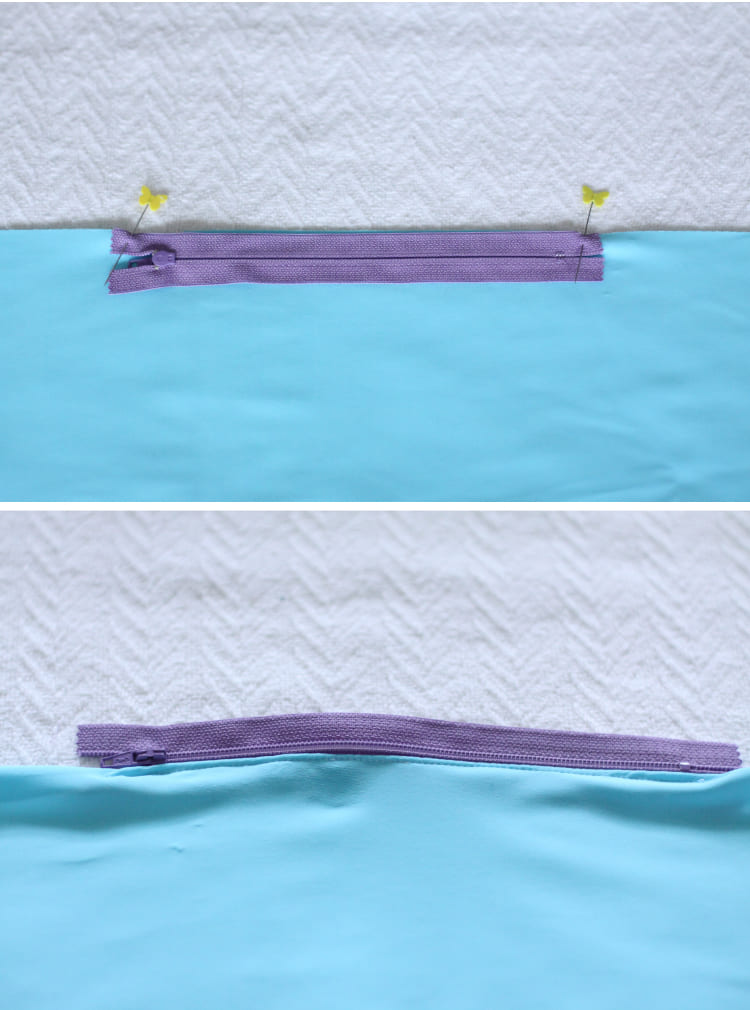
Now, align the non-sewn side of your zipper up with the top side of the other half of the fabric, right sides together. Using your zipper foot, stitch close to the zipper teeth. Then, turn the fabric so the right side is facing out and top stitch.
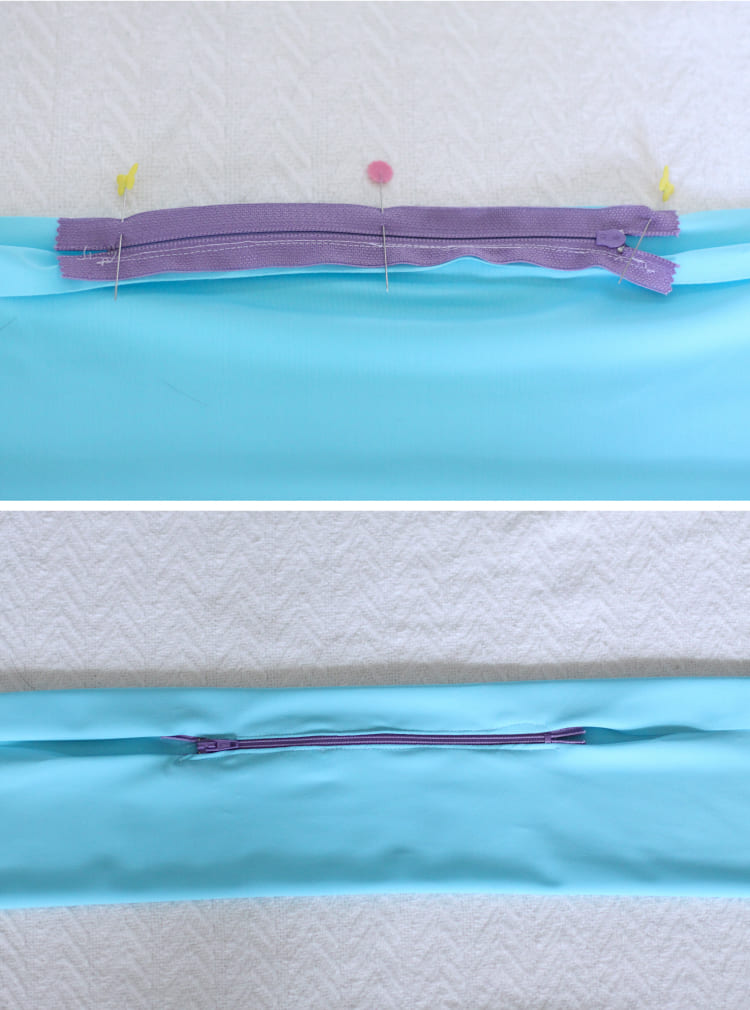
Now, turn the belt wrong side out and stitch up the sides. I used my serger for this part, but a zig zag or stretch stitch would work great too!

Unzip the zipper half way and tuck the ends into each other so that right sides are together then top stitch around the tube.

Turn the belt right side out.

Cut 2 pieces of your FOE to the length of the belt, plus 1/2 inch. Attach the fold-over elastic to the top and bottom of the belt using a zig zag stitch. I set my sewing machine with a stitch length of 4.0 and a stitch width of 3.0. This FOE will help keep the belt from rolling and bunching up.
*Tip: This part can be a little tricky as the fabric is slippery. I used binder clips to help keep the elastic in place as I sewed. Just keep working the fabric and be careful not to rotate the fabric when sewing.

And that’s is! Now we can be hands free on walks, runs, and prancercise sessions!


Happy Sewing!


0 comments:
Post a Comment