
I love a little pouch and they are such handy quick little items to stitch up. But I have to say that sometimes, I just can't face the zippered part of it. I never have the right size zip and I spend ages puzzling over how to resize either the pattern or the zip. So, I thought I would present to you my Happy Little Poppered Pouch.
The Happy Little Poppered Pouch Tutorial
For the outside of your pouch:
Cut 2 rectangles of fabric 8½ x 10½ inches
For the lining:-
Cut 1 rectangle of plain fabric {mine is pink} 8½ x 20 inches
For the pouch flap:-
Cut 1 of lining fabric and 1 of outside fabric = 8½ x 4½
Wadding - cut 2 pieces of wadding slightly larger than each of your outside pieces of fabric
Seam allowances = 1/4 inch
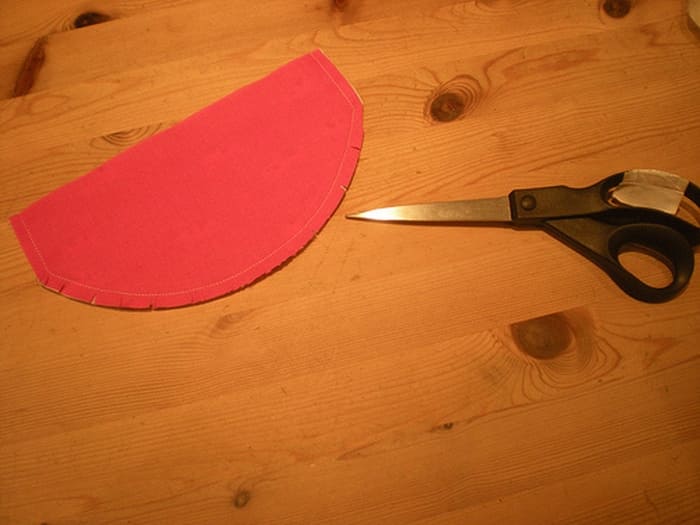
1. Take the two flap pieces.

2. To make the curved part of your pouches flap, cut around the edge of a dinner plate;

3. Pin the layers right sides together with one layer of wadding on the bottom of the stack.
Stitch around the two narrow sides and the curved edge, leaving the top side open for turning.

4. Clip notches around the curved edge before turning, taking care not to snip into your seam allowance;
5. Turn the flap out the right way and press with a hot steamy iron before top stitching around the edge for a nice, professional finish.

6. Now take your outside fabric and place it on a layer of wadding. Stitch around the edge of the panel, and/or quilt as desired. Then trim the wadding to the same size as each panel.

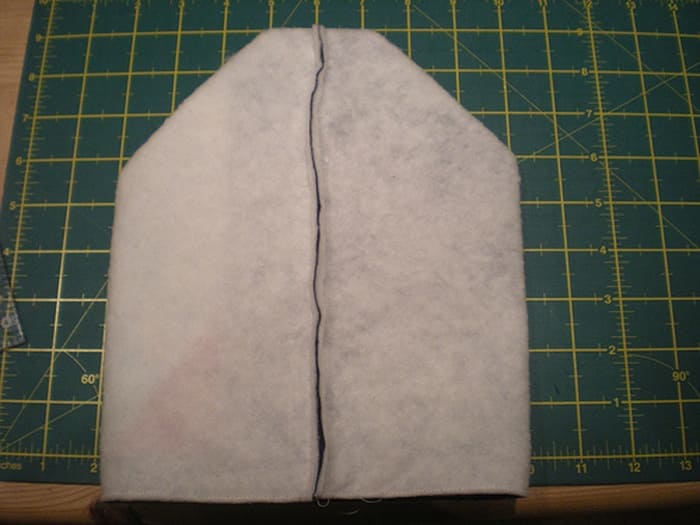
7. Place the outside panels with right sides together and stitch around one long side, the bottom short side and the other long side.
To box the corners of your pouch, cut a 1.5 inch square from each of the bottom corners {see the next two photos}.


8. Grab the pouch and line up the seam where the squares you just cut out were, that the side seam looks like the photo below.
9. Sew securely the seam allowance on your boxy corners on each side;

10. Take your lining fabric and fold it in half
Sew along each side edge,leaving a 3inch gap on one side for turning . The fold will be the bottom of the pouch.

11. Cut 1.5 inch squares out of the bottom corners and repeat process of boxing the corners as you did for outside of pouch;

12. Take fold of your pouch flap.
I find it easier to attach it to the outside of the pouch at this stage by basting it to the back side of the pouch right sides together.

13. Now turn your lining inside out and place it inside your pouch so that the right sides are touching. Line up the top edge and stitch around the top with a 1/4 inch seam.

14. Turn your pouch out through your the gap that you left for turning in the side seam of the lining, which you can then sew closed. Press and top-stitch around the top of the pouch. This will also help the flap of the pouch fold nicely over.

15. Now it's time to add your snap to the flap. In the photo above, you can see some of the bright colourful snaps available.
Below is a picture of the KAM Snap Press Pliers which are really super easy to use.

16. Position your snap on the body of the pouch also.

17. Those hairy hands are my hubster's not mine!

18. Press your snap closed and lickety split you are finished. Yay!


0 comments:
Post a Comment