
How to make a beautiful drawstring pouch from only one piece of square fabric.

Materials you will need are:
[Small Pouch / Finished Size 12cmW x 8cmD x 13cmH]
1 Square Fabric / 46cm(18") x 46cm(18"), 2 Cords / 34cm(13.5"), 2 Beads which have holes large enough to string the cords you have.
[Medium Pouch / Finished Size 13cmW x 9cmD x 15cmH]
1 Square Fabric / 50cm(20") x 50cm(20"), 2 Cords / 36cm(14"), 2 Beads which have holes large enough to string the cords you have.
[Large Pouch / Finished Size 16cmW x 10cmD x 19cmH]
1 Square Fabric / 60cm(24") x 60cm(24"), 2 Cords / 42cm(16.5"), 2 Beads which have holes large enough to string the cords you have.
These measurements are just FYI to get an rough idea what you will have finally. You can use your fabric square in any sizes actually. That means this project would be so great to use up fabrics in your stash. Or you can use fabric napkins or silk scarves you won't use anymore. (A good thing about using those items is you don't need to hem your square.)

You can apply this method to any sizes of squares.


You need a piece of square fabric.

Fold diagonal lines and make creases lightly.


Trim all corners. 1cm seam allowances all four sides.

Fold and press all sides and stitch.

All raw edges are nicely hemmed.

Divide one diagonal line in three and mark.

Bring a corner to the mark and make a crease.


Bring the same corner to the other one and fold the square in half. Put pins on the crease that you just made and secure two layers.

Sew layers together along the crease.

Open the corners and bring to center. Then press seam.
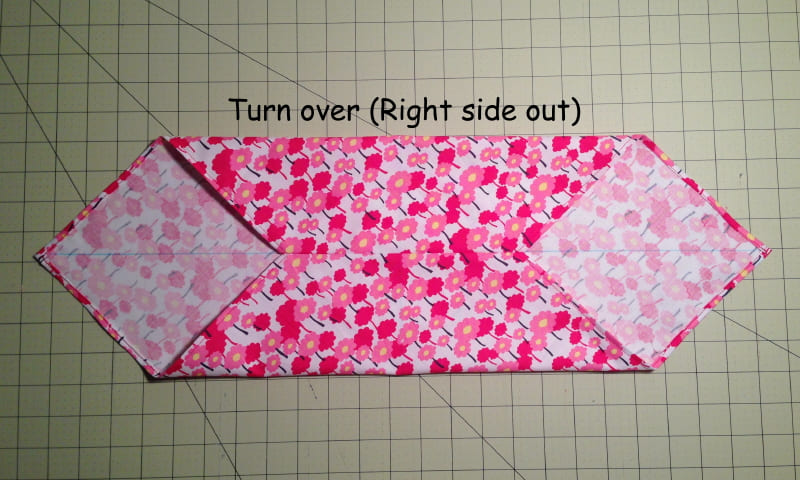
Turn right side out and press folds.

Fold both ends as showed in photo and secure with pins.

Stitch from 2cm from ends.

It should look like this.

Fold right side out in half.

Stitch sides at 0.1-0.2cm from edges. Leave 4cm from top.


There are pockets already made under flaps.

Turn, then make triangular gussets on bottom corners.


It should look like this now.

Turn over. Gussets are made beautifully.

You are almost there!


Thread two cords following arrows in photo.

Attach beads and make knots on the end of cords. Finished!!


0 comments:
Post a Comment