
I have a super easy and sweet tutorial for you today! I wanted to create a bunny pouch that I could sew up quick with all enclosed seams and no buttonholes! It is sew easy and you’ll be able to whip up a bunch in a short amount of time!
What you’ll need:
4 squares of fabric 5″x5″ (2 outer and 2 lining)
2 sqaures of fabric for your bunny ears (5″x5″) – you can use contrasting fabric for these!
seam ripper
ribbon for drawstring
Step one:
With your contrasting fabric, use a fabric marking pen and draw two ears. Place fabric right sides together and sew along the line. Trim around each ear.

Step two:
Turn ears right side out and press seam.

Step three:
Take your two outer fabric squares and sew along three edges. Clip corners
Take your two lining fabric squares and sew along three edges but leave a 2″ opening to turn the pouch in a later step.

Step four:
VERY IMPORTANT!!! Do not skip this step!
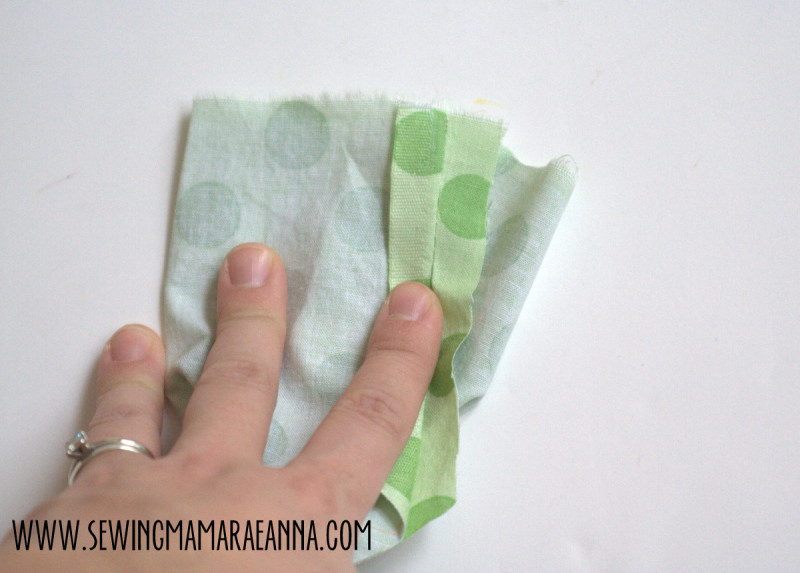
Press the seam open on the outer fabric squares near the top raw edge. This will allow you to thread your ribbon casing and keep you from having to sew button hole openings for the ribbon! Repeat for the other side seam.
Step five:
Turn the lining square pouch right side out. Place inside outer fabric so the right sides of both are facing each other.

Step six:
Now, fit your bunny ears in between the layers of the pouches. You will want to slide them in so all the raw edges line up at the top.

Step seven:
Pin in place all along the top edge. Sew along the edge with a 1/2″ seam allowance.

Step eight:
After sewing around entire circle, bring the lining out to find the 2″ opening.

Flip pouch right sides out through the 2″ opening of the lining. Sew the lining opening closed.

Step nine:
Stuff the lining down into the pouch. I forgot to take a tutorial picture for this step, but you will want to sew a casing 1/2″ below the top of the pouch. (You can see the casing stitches in the picture below. Then, take your seam ripper and remove the 3-4 stitches between the bottom casing stitch and the top of the pouch.

Step ten:
Take one ribbon (approximately 16″) and with a safety pin, insert the ribbon all the way around the casing. One ribbon will enter on the right side seam and exit on the right side seam.

Step eleven:
Repeat step ten, only inserting the second ribbon on the left side seam and running it through the entire casing back to the left side.

Step twelve:
Knot the ends of the ribbon (trim off any excess length that you don’t want) and pull tight to create the drawstring!

I’m looking forward to filling them up with treats for the kids on Easter!


0 comments:
Post a Comment