
Today's project will use a total of just 16 charms, plus a fat quarter for your lining and a fat eighth for your sashing.

The Double Hourglass Pouch
**Use a scant 1/4" seam unless otherwise noted**
You'll need:
(8) 5" charm squares of white/neutral fabric
(2) 5" charm squares of four different prints, total of (8) charm squares
I used prints from Cosmo Cricket's 2wenty-Thr3e collection
fat eighth of sashing, cut into:
(2) 1 1/2" x 8"
(1) 3 1/2" x 10 1/2""
(1) 1 1/2" x 10 1/2"
10" zipper
fat quarter of lining, cut into:
(2) 10 1/2" x 12"
1/3 yd Pellon Craft Fuse, cut into:
(2) 10 1/2" x 12"

To piece the patchwork for pouch front:
1) To begin, cut two planks measuring 1 3/4" tall by 5" wide from each of your charms, creating a total of 16 white planks and 16 print planks. Don't toss aside the skinny remaining strip of your printed charms, we will use some to make the zipper tabs.


2) Take four matching print planks and four white planks and sew together in pairs, print to white. If your prints are directional, keep in mind that you want two identical pairs with the print on top, and two pairs where the print is on the bottom. Press seams open.

3) Bring assembled pairs to your cutting table, and using the 45 degree marking on your ruler, trim. Align the 45 degree marking along the raw edge of the bottom of your patchwork, and trim. Flip the ruler to create the opposite side of the triangle, and trim. You're now left with a triangle. Discard the scraps and repeat with the three remaining patchwork sets, creating two sets of identical triangles as shown.


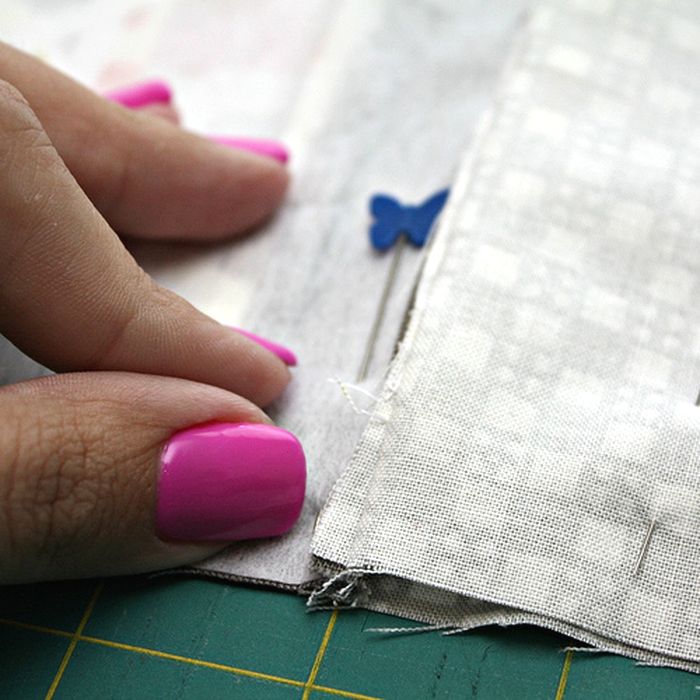
4) Lay out your block and assemble, pairing two opposite triangles together and joining, pressing seams open, and then joining the two halves of the unit to create a whole patchwork block. Use pins at to assist you in making your seams meet, as needed.


5) Repeat with remaining print and white planks to create four double hourglass blocks.
6) Lay out your four blocks as desired, twisting and turning them if you like. Sew the blocks together first in rows, then join the rows. Press seams open.

7) Join a skinny sashing 1 1/2" x 8" strip on the right and left of the block. Press seams open.

8) Sew the skinnier of the two remaining sashing pieces to the top of the block, then sew the larger, 3 1/2" x 10 1/2" piece to the bottom.

9) Next, take one piece of Craft Fuse and place the shiny side with the wrong side of the pouch front. Using a hot iron, fuse the Craft Fuse in place. Repeat for the pouch back.
To install the zipper:
1) First, we need to trim the zipper to size. The zipper should be exactly 1 1/2" shorter than the top of the pouch, so trim as needed. I trimmed off from the zipper stop side of the zipper, rather than the top of the zipper.

2) Next, choose two leftover print planks and trim to 2 1/2" long. Press each of the two pieces first in half, then fold in half and press a second time, much like a double-fold binding.


3) Open the zipper tab sandwich and insert the end of your zipper, taking care to align the end of the zipper inside the sandwich. Sew the sandwich closed, topstitching about 1/8" from the sandwich edge.


4) Repeat step 3 for the top edge of the zipper, first unzipping the zipper to get the pull out of your way.
5) Trim zipper tabs even with the length of the zipper.

6) Next, align up one of your lining pieces, right side up, on your cutting mat, lining up the sides of the of the lining piece with the lines on your cutting mat. Place the zipper on top, zipper pull up, centering the zipper so that the zipper is approximately 3/4" from both the right and left edges of the lining.
Put some pins in place, close to the zipper teeth, to keep the zipper in place and bring to your sewing machine. Set the stitch length at 5.0 mm and baste the zipper in place, sewing very close to the raw edge of the fabric.


7) Bring the zipper/lining unit back to your cutting mat and align the raw edges of your pouch front with the lining, right sides together. Pin in place, and try to get those pins as close to the zipper teeth as possible.

8) At your machine, adjust the stitch length back to a 1.5-2.0 mm stitch, whatever you normally sew with. Rather than starting at the raw edge, start about 3-4" down - away from the zipper pull.
We'll go back and attach that section in a moment. Sew the pouch front, zipper, and lining together, using your zipper foot. Sew all the way to the end of the zipper, then clip the threads.

9) Open up your pouch so far, so the right sides of your fabric face you, and unzip that zipper. Get the zipper out of your way, then close the pouch back up, line up the raw edges again, and sew the remaining part of the zipper in place. Make sure to backstitch when you reach your first line of stitching.

10) Using a hot iron, press the pouch front and lining away from the zipper, then topstitch in place.


11) Next, we'll attach the remaining pouch parts. First, line up the remaining lining piece, just as we did in step 6, and align the zipper (now attached to the pouch front and one piece of lining) with the raw edge of the lining, again centering the zipper, with the lining right sides together. Pin as needed.

12) Baste the zipper and second piece of lining together, using that longer stitch length, then align the pouch back, right sides together with the pouch front, and pin as needed. Sew the zipper in place, using the same method we did in steps 8-9, sewing part of the zipper in place, and then opening the zipper to get it out of your way.
Alternately, you can attempt to open the zipper while sewing, lifting your presser foot, and rotating your pouch to finagle the zipper. Use whichever method works best for you.

13) Press the pouch back and lining away from the zipper and topstitch.

Finishing the pouch:
1) Now that the zipper is fully installed, we can finish up the pouch. This is the most important step of this tutorial - open the zipper at least 3/4 of the way. If you open it up all the way, the zipper pull may get in your way, so I usually open the zipper right about 3/4 of the way open.

2) Next, line up the raw edges of the lining with each other, right sides together, and ditto for the pouch front and back. Pin the raw edges together, leaving a gap on the lining bottom about 5" long - enough for you to shove your hand in and pull the right sides of your pouch out. I mark the start and stop of the gap with two pins, so that I know where to start and stop my sewing.

3) At the zipper, match up the raw edges, and pin. Push the zipper tabs toward the lining to keep them out of your way. Sew together, using a 1/2" seam allowance, and taking a moment to backstitch at the lining gap start and stop.
4) Reach into the lining through the gap we left in step 14, and reach for the pouch front. Pull the fabric through the gap, turning the pouch right side out. As you do this, make sure to push the corners out. Feel free to use a wooden turning tool, or even a pencil eraser, to try to push the corners out fully. Make sure also to push out the corners at the zipper end of the pouch. Repeat for the lining once you get the pouch front/back squared away.


3) You'll notice that the gap that you left in the lining already wants to close up, and may even start to align itself properly. Take a moment to fold the raw edges under, approximately 1/2", and sew the gap closed, either via handstitching or topstitching. I almost always topstitch, just for added security at the bottom of my pouches.

4) Finally, push the lining into the pouch, and marvel at your finished pouch!


0 comments:
Post a Comment