
I love using fused plastic bags for sewing projects because it is very sturdy and surprisingly simple to cut and machine stitch. Brown fused bags almost look like leather, but you can use just about any color of plastic you can find for this project.

How to fuse plastic bags into a crafting material for making embellishments or even sewing projects. Here's DIY tutorial for making a tote bag out of fused plastic: www.youtube.com

Materials
28 plastic shopping bags
iron
cutting and measuring tools
basic sewing tools
2 - 30-inch long pieces of 1-inch wide strapping with finished edges so they don't fray.
paper clips (optional)
Directions
Before you begin, you may want to wash your plastic bags, especially if any food or liquid spilled in them. Believe it or not, you can wash your bags in your washing machine with cold water on a gentle setting. Then, just hang them outside to air dry. DO NOT put them in the dryer!

Make 14 pieces of fused plastic. Here's the how-to video.

Cut 8 squares that are 7 x 7-inches.
Cut 6 rectangles that are 5 x 7-inches.
There's no real right or wrong sides to your plastic. It all depends on what you want to be seen on the outside of your bag.

Next you are going to stitch two squares, right sides together, along one side using all-purpose thread with 1/2-inch seam allowances. Use a moderately long stitch length or you will perforate the plastic. Repeat for the remaining pairs of squares.
Pair the rectangles and stitch one of the short sides of each pair together.

Finger press the seams open.
Stitch all of the seams open, 1/4-inch from the seam.

Next, place two sets of the stitched squares, right sides together. Since you can't pin the plastic without creating small holes, it's handy to use paperclips to hold the pieces together so they don't slide.
Just be careful to remove the clips before you stitch over them so you don't damage your sewing machine.

Again, finger press the seams open and stitch them down 1/4-inch from the seams.

Finger press one edge of each of the square pieces down 1/2 inch and stitch 1/4-inch from the fold.
Repeat along the short edge of two of the rectangle pieces.
The folded down edges will be the opening of your tote.

Position your straps so they are 6 inches apart and centered on the top edge of each of the square pieces.
You can hold down the straps with paper clips, again being careful not to sew over the paper clips.

Stitch the straps in place.
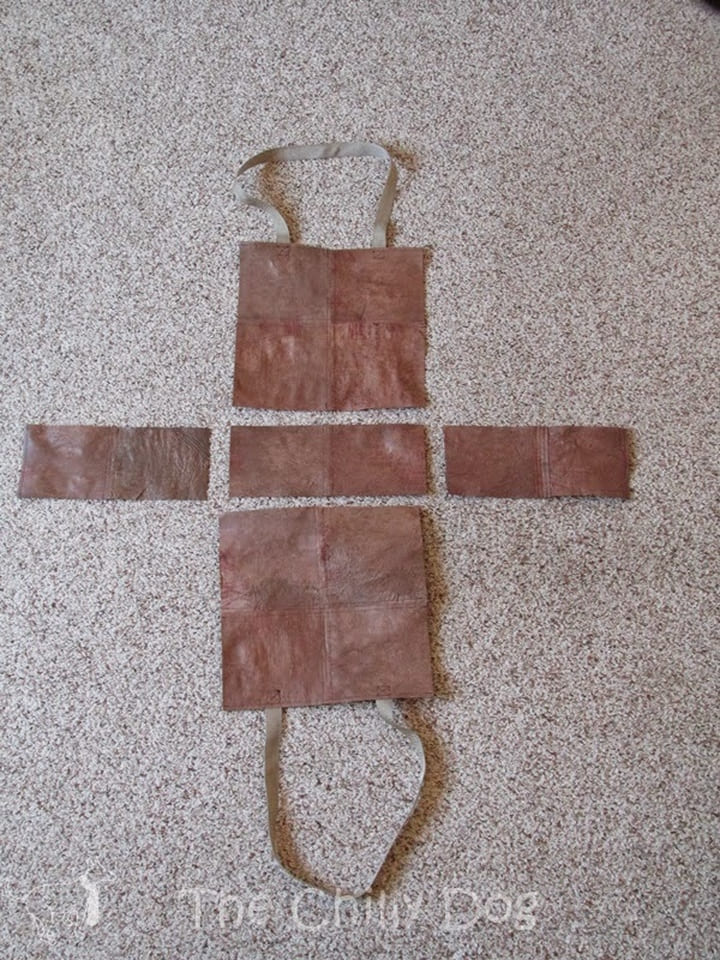
Lay out the pieces of your tote as shown.
Stitch all four sides to the bottom piece, right sides together.
You can finger press the seams open and stitch them 1/4-inch from the seams as before if you choose.

Finally, stitch the sides of the bag together. I chose to stitch the sides right sides together and then turn the bag right-side out and it was a little tricky.
So, I actually recommend stitching the bag sides wrong sides together. It should be a little easier and will still give you a neat finished look. Don't worry about pressing the side seams open.
Enjoy your sturdy new tote for carrying groceries or whatever you choose and smile because you just saved 28 plastic shopping bags from a trip to the landfill!


0 comments:
Post a Comment