
Zipper pouches and bags are so much fun to make and so very versatile. It seems no matter where I go or what I am up to I can always use another bag.
Today I am sharing a quick zipper pouch, that goes together in no time at all. I went into my stash to pull a couple of pieces and found this vintage looking floral and paired with it with a fat quarter from my quilting stash. Too many stashes in this house! But what fun I can have going through it all!
This is a great scrap project.
You will need:
2 main body pieces and 2 lining pieces each cut 9 1/2 inches x 4 inches.
You will also need 2 zip tab pieces each 1 1/2 x 1 3/8 inches.
Easy Zipper Pouch Tutorial
First trim your zipper with the tabs, folding under a small amount on the short end and attaching the tab to the zipper by sewing on the fold.
Match up the raw edge of the zipper with the raw edge of the tab. Sorry I had the tabs sewn and the zipper on one side before I realized I had no pictures. Some times I get so excited for the finished product I forget to take pictures! You can see the short tabs attached in the picture below.

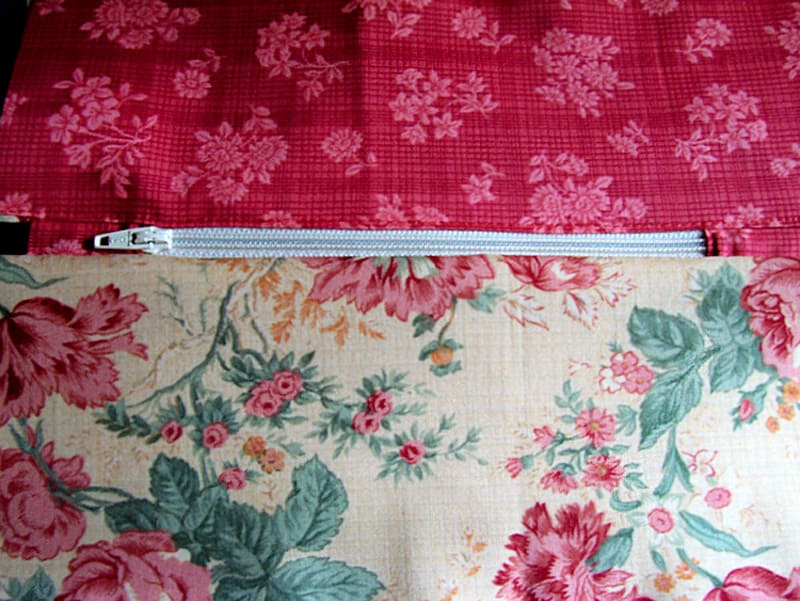
Next attach one side of the zipper. I made my case with alternating fabrics so my lining and outside each have one panel of my two fabrics.
You are going to make a sandwich. Outside print right side up, zipper right side up, and then your lining piece wrong side up on the top.

Sew through all layers.
Flip so that our zipper and exterior of you case are up and top stitch along the folded edge.

Repeat with the other side. I simply reversed the order so that my pouch showed both of my fabrics on the outside and the inside.
The outside of my bag now looks like this-
Put it All Together
Next you will sew your pouch together.
Open the zipper and match all your edges right sides together. Sew all around leaving an opening on the lower edge for turning.

Trim your corners, turn through the opening.
Sew the opening closed.
I simply top stitched the opening because it is in the lining and no one will see it.
Push out your corners, smooth out the lumps in the lining and zip shut!
This makes a perfect pouch for carrying make up brushes or anything else you may want to slip in your purse and not lose on the bottom in no man ‘s land. And the fun part- make them to match the season or add a strap and use it as a small purse. So versatile!


Happy Sewing


0 comments:
Post a Comment