
Got a crappy pair of jeans lying around, and some fun fabric, embroidered or not ? Add some ribbon and a sewing machine and you'll recycle the neatest bag ever !
Tutorial : Make a Reverse Appliquéd Drawstring Jeans Bag
Talk about recycling - a jeans leg, a test stitch-out, a length of grab-bag ribbon, and ancient thread all came together to make me something new ! Free, too ! So I took pictures as I went, intending to write a tutorial on recycled reverse applique !

If you'd like to make something similar, here's what you'll need :
*A jeans leg
*Scissors
*Thread
*A sewing machine (you can hand-sew, it'll just take forever)
*Ribbon of your choice (enough for a drawstring, at least as long as your opened jeans leg, plus about another third of that)
*An embroidery stitch-out or fabric for the applique
*A safety pin or bodkin
*A pencil or other marker
*A ruler
*The stuff you plan to keep in your bag, for fitting
Optional : A seam ripper and Fray-Check

So. We begin !
Use the stuff you plan to store in your soon-to-be bag and mark about how big it'll need to be. Add about two inches, for seam allowances and the casing. Draw your lines and cut down to size.
Then, using scissors or the seam ripper (your choice), open the inner leg seam - you know, the one that isn't thick and over-stitched - and lay your material out flat.
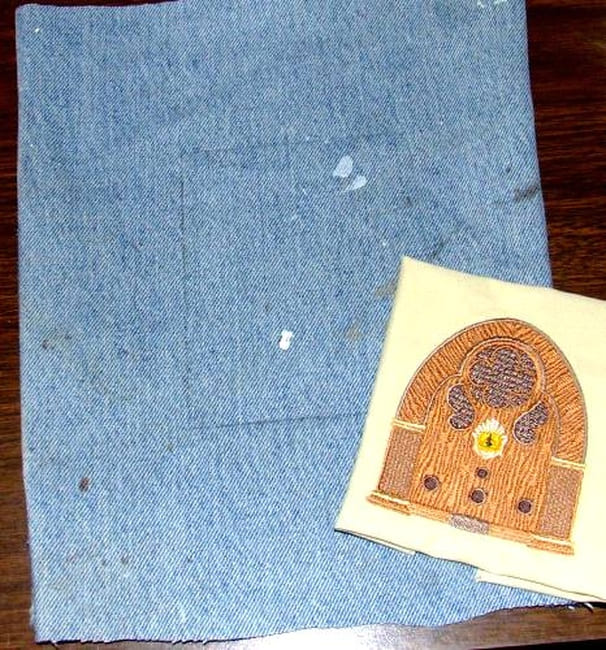
Grab your stitch out or applique fabric, and fold it to about the size you want. Let's say mine is five inches square (because I didn't measure when I did this (blush) ) . Draw a five-inch square on either side of your fabric, and cut it out. Make sure your embroidery or fabric will fit. And keep in mind you'll probably use about three inches from the top edge as your casing later - you won't want your applique to be a part of that !
When in doubt, go lower - so the design isn't caught up in the casing or the 'gathering' part.

Thread up your sewing machine, make sure you have a good needle, and stitch a sort of 'stay' line about a quarter inch in from the 'frame' you cut earlier. All the way around.

Take a snip at each of the four corners, right to the line of stitches you just sewed. Then, fold and pin down the fabric along the stitch line to the inside of your bag-to-be.
Now, this part is up to you. You can go ahead and sew it down, or add your applique fabric or stitch out, and sew it and the hem down at the same time. Me, I like to be sure, so I sew the hem, then sew the applique in. That way, when I'm sewing the applique, I don't have to worry about the hem rolling up.

If you haven't already, lay your hemmed square over the applique fabric or stitch out, wrong side of jeans to right side of applique. Position it 'til it looks right, pin it down, and sew it in.
In this photo, you can sort of see the 'hem', and the applique is pinned in. Since the hem is already sewn, I can stitch from the right side, and pretty much sew right over the hem, so it looks like just one line of stitching.
See what you did ? Instead of normal applique - sewing over the top of a hole - you sewed something over the hole from the inside ! Reverse applique !

Now that we're done with the decorative part of our drawstring bag, we can knock together the 'bag' part !
Remember the side-seam we cut or opened, to lay the fabric out flat ? We're gonna hem part of those sides, so that the drawstring casing (the hole part the ribbon will run through) is nice and smooth, with no raw edges facing out.
So, measure out about three inches - possibly more if you're using wider than 3/4-inch ribbon - from the top along each side seam. You're gonna fold about a quarter-inch from the right side to the wrong side - or outside to inside - and sew it down. Leave the rest of the sides, we'll sew 'em up later.
But if you wanna, you can use Fray-Check on the unsewed part.

Here's the hem, looking on the right side. It's nearly time to make your casing, so keep your ruler handy, and grab your ribbon !

OK. Measure your ribbon's width. Mine, for example, is 3/4 of an inch wide. Add about a half inch more, for seam allowance and folding. That gives me 1 and 1/4 inch - so I measure that down from the top edge, and mark it. All the way from one hemmed long edge to the other.
We're gonna run a 'fold line' of stitches from one side of the bag to the other, being super-careful when stitching over the two hems and the thick jeans seam. Some throat plates will have this measurement on them already, but if your sewing machine's isn't marked, you can always measure and mark the distance with tape or pencil. Stitch a good strong line from the side hem to the side hem, straight across.

Here you can see the stitched 'fold line'. It may seem unnecessary, but it helps to keep things even, and doesn't really show.

Now, you're gonna use that 'fold line', and fold the jeans towards the wrong side (inside) and pin down. I used a quarter-inch seam allowance to sew the casing down.
Make sure the casing is as clear and empty as possible. While you can't see it, I trimmed the fabric around the applique, to make sure it didn't get sewn inside and clutter up the casing.

Here, you can see the casing, nice and smooth on the outside, and you can also see the seam allowance.
We're nearly done ! Grab your ribbon and bodkin, or a safety pin if you're bodkin-less. Attach your pin or bodkin to one end of the ribbon, and get ready to case your bag !

You're gonna feed the ribbon through the casing you just sewed, using the pin or bodkin as a guide - it's far easier to feel and pull a pin than the ribbon. You'll probably have to wiggle with it a bit around the jeans seam in the middle, but patience is your crafting buddy !
Once the ribbon is all the way through your casing, you may wanna tie knots at the ends, to keep it from pulling through. It's far easier to run the ribbon through when the bag's flat than when it's...well, a bag.

Time to sew up the side seams ! Bring the partially hemmed sides together again, matching them from the top. It won't matter if they're a bit off at the bottom, as you'll soon see !
Measure out about a half-inch below your casing, and start to pin the sides together. You don't wanna sew through your ribbon, and your bag does need a bit of an opening before the seam starts, for the ribbon to slide easily.

And here it is, all pinned up. Two seams - or one long one - and we're done ! Sew from the side, where that pin starts you off, and either run one all the way down, then sew up the bottom seam all the way across, or sew it as one seam, pivoting where the side seam and bottom seam meet. Trim to about a quarter-inch from the seams, and apply Fray-Check if you like. Turn right-side out.

And there ya go ! You reused castoff denim, used a stitch-out or a scrap of fun fabric, and you now have a one-of-a-kind bag for nearly anything - music, medicine, sewing notions, pencils, nearly anything.
For added fun, attach buttons to the ribbon ends, to keep it from disapearing into the casing. Or use a shoestring instead of a ribbon. Add trim to the applique 'frame', or lace to the outside of the casing while you're sewing down the inside. Have fun, and go with it !
'Cause you probably still have another jeans leg...


0 comments:
Post a Comment