
I wanted a zipper closure for the diaper bag I just made. Specifically I wanted it sitting at the top of the bag (as opposed to a recessed zipper which sits a inch or two inside the bag) and attached to only the long sides of the bag.

I thought I would do a tutorial on how I did this so took pictures along the way. One of my main concerns was thickness when sewing the exterior and lining together since I used vinyl on exterior, so my method was based on having the fewest layers possible.
Now I think this would work with any bag contruction where you contruct the exterior and lining seperately so I'm not going to detail how my bag was constructed. Before you build your exterior, fold down and press your seam allowance on the top edge of the bag. (The part where you'd usually sew your lining and exterior together). Then construct your exterior as normal.
Don't cut your lining fabric yet as we will modify the pattern a bit. You will need a zipper that is a few inches longer than the width of your bag.
We'll start by cutting out the fabric for the zipper panels, ie the two pieces of exterior fabric that are attached to the zipper. The length of the two strips should be the length of the front of the bag plus seam allowance. The other side of the strip was about 1/2 the width of the bag gusset PLUS another 2 inches. By bag was 18" wide with a gusset of 7", so my two strips were 19"x 5.5" (I was using 1/2" seam allowance). Cut these strips and put aside. If you are wondering the zipper will be attached directly to the lining, so that's why we are only cutting exterior fabric.
Let's get the zipper ready. Cut a piece of fabric that is 2" inches by 4 ".

I used a 22" zipper
Fold the strip of fabric right sides together and sew along the two long sides, keep the short end open. Turn right side out


Pin to the end of the zip with the open end at the zipper end, sew across the zipper


Flip the piece of fabric over the seam you just did, hiding the raw edge, sew across again.

You should now have something like this, put aside.

Now for your lining. When cutting your lining fabric, make your front and back pieces taller by half the width of your gusset + seam allowance. So in my case I made the front and the back taller by 4 inches since my gusset was 7" and my seam allowance was 1/2".
And this is only for the front and back, keep your gusset piece the orginal size. Assemble the lining as usual. You don't need to keep a hole in the lining for turning over. When done you shold have something that looks like this.

Lining assembled, front and back is longer that the sides or gusset. (The white is interfacing as I was trying to stiffen up the bag a bit, I didn't interface the top part of the bag because the exterior had a vinyl collar on top)

Lining assembled - front and back with extra fabric folded over
Now we will sew the lining, zipper and zipper panels together. This is very similiar to sewing the zipper in a lined zipper pouch so if you have done that, you'll find this easy peasey..
Take your lining right side up, place your zipper right side up on that, and then place your zipper panel right side down. All top edges should be lined up, your zipper tail hanging at the end. Fold back the seam allowance of the short edges (the edges perpindicular to the zipper) of your panel and your lining.

lining, zipper, fabric panel
Lined up at top, end tail of zipper hanging out, edges folded over
Sew along the zipper with your zipper foot, catching the folded ends.

Sewing along the zipper who is hiding under.
Flip the fabric wrong side together and then sew down the the folded edge of your panel and lining (perpindicular to the zipper)

Pin the two pieces of fabric together and top stitch along the zipper to keep fabric in place. This will make sure the lining doesn't get caught in the zipper. (As an aside, as mentioned I don't use pins much anymore but in this case, clips won't help in keeping the middle fabric together, so I used pins.. and I pricked myself.. twice, once of each side of the bag.. )

Pin and topstitch
Now do the same for the other side.. When down you should have something that looks like this.

Nearly done now! Just need to put the lining and the exterior together. Take your exterior which shold have the top seam allowance pressed down. My edge was vinyl, so I used a glue to hold the seam allowance down

Exterior with seam allowance turned down.
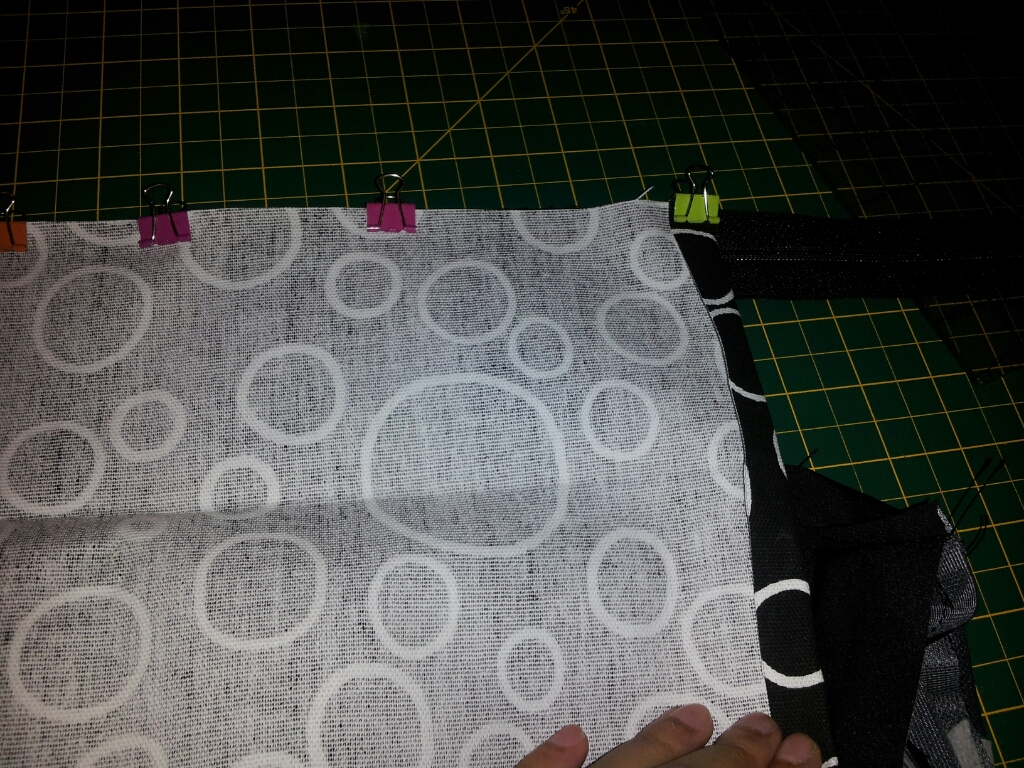
Place the lining inside the exteror. Your zipper panels should start and end where your gussets begin. If you are putting handles between the lining and exterior do so now. Neaten so the zipper panels are even and edges tucked in. I used clips where I could. Since I had no edge along the zipper panel for the clips I used double sided tape to hold in place. I taped below the folded seam allowance so I didn't have to sew through the tape. (Pins wouldn't work as it would leave holes in the vinyl.)
Pin and sew around the exterior's top edge. Make sure you keep close to the edge, so you catch the folded seam allowance. In my case I sewed across the top edge of the white band.

And... that's it! I'm sure there are different and better ways of doing it, but this worked for me with just four layers (exterior, exterior seam allowance, zipper panel, lining) when sewing the exterior and lining together. With the vinyl I was already have a few issues sewing this, so even one more layer may have caused major problems.
Hope it can be helpful to others!


0 comments:
Post a Comment