
I paired that with a simple, sawtooth star and came up with this little linen zakka-style lunch sack. We are going to use some upcycled vinyl so that any fabric can be used for the lining and it will still be waterproof and easy peasy to clean! I made it using linen and Heather Ross Far Far Away III, but it could easily be adapted for a little boy or even a grown up.
To make this lunch sack, you are going to need:
1 FQ Linen or Background
Large scrap of focus fabric for star
1 FQ for Lining
Upcyclable piece of vinyl (or purchased from Joanns)
13″X 22″ piece of Insulbright (or batting, if you prefer)
Button, Needle, Thread
Pins and notions (I
Lets get started!
Cut:
(2) 3.5″ ‘fussy cut’ squares from your focus fabric
(8) 2.5″ linen squares
(8) 2.5″ focus fabric squares
(8) 2″ squares of linen
(2) 2.5″x 6.25″ pieces of linen
(2) 3″ x 10.5″ rectangles of linen for the below the star
(2) 4.5″ x 10.5″ rectangles of linen for above the star
(2) 10.5″ x 12.75″ from lining fabric
(2) 10.5″ x 12.75″ from vinyl
(2) 10.5″ x 12.75″ from insulbright


Whew! Now that’s done, let’s make our star! Start by making 16 Half Square Triangles using the 2.5″ inch squares. Draw a diagonal line corner to corner on the back of the linen, match up with the focus squares and sew 1/4″ on each side of the line. Snip apart and press!

Sew the HST’s into pairs. On four of the pairs, add the solid 2″ square at either end. Like so:

Sew the short pairs onto the 3.5″ fussy cut square. Then, sew the the longer pieces onto the empty sides of the 3.5″ squares.


Next we are going to assemble the outer shell of the lunch sack. Sew the 2 2.5″x 6.25″ to either side of the star. Then, place the 3″ strip on the bottom, the star strip in the middle, and the 4.5″ piece on the top. Sew together.

Once they are assembled, make a small mark on one of your outer shell pieces in the middle, right above the star. Iron a small piece of fusible interfacing on the back of the fabric, then affix your button on that mark.


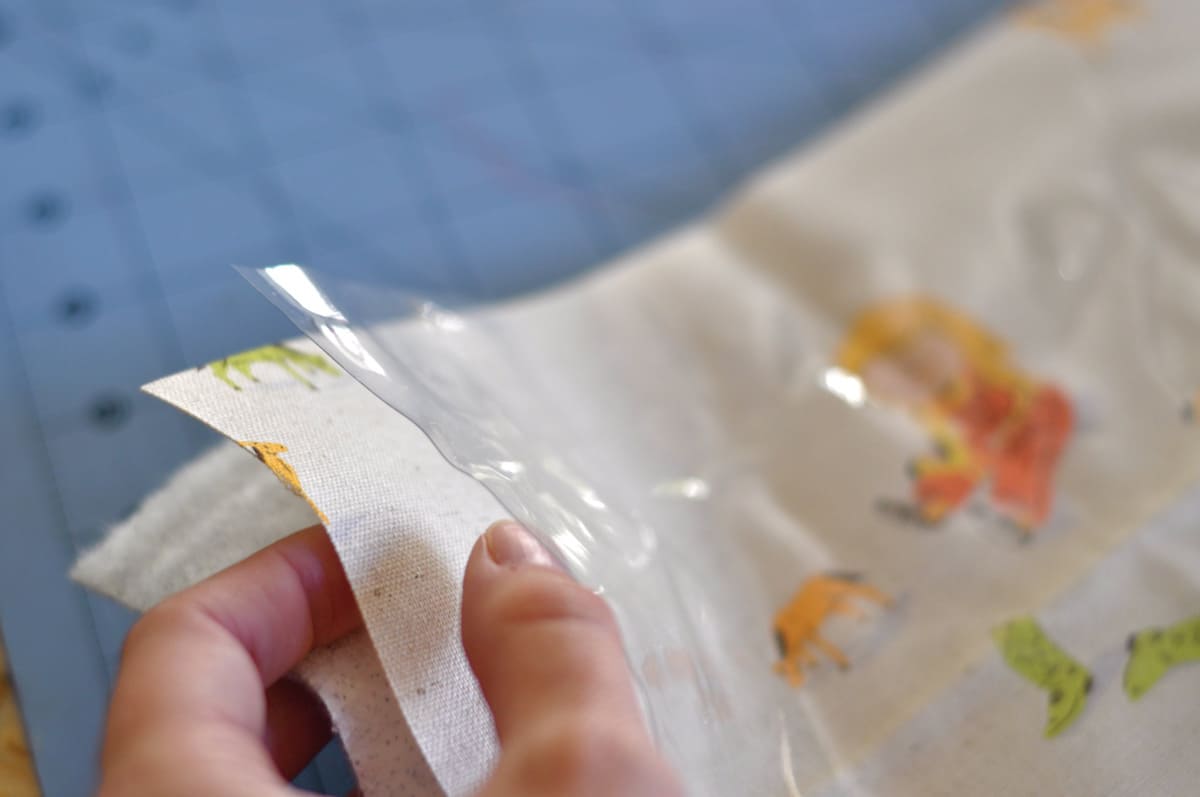
Now, we are going to assemble the lunch box. Gather your lining fabric, vinyl, and insulbright.
****NOTE: I sourced my vinyl from my linen closet. I have several of these vinyl zipper pouches that sheets come in laying around. I simply cut it along the seams with scissors, pressed out the wrinkles by laying some flannel on top and pressing with a hot iron. I would NOT recommend placing your hot iron directly onto the vinyl****


Layer your three lining pieces like this:
I pinned these three together and zig zag basted around the edges, just to keep the vinyl from slipping all over the place. You will do this twice, once with each set. Then, I placed them vinyl sides together and sew the sides and bottom together. Do the same to the outer shell by placing the two pieces right sides together and sew the bottom and sides together. Move to your cutting board, and cut and 2.5″ square out of each bottom corner.

Now, fold the bottom corners so that the side seam touches the bottom seam and pinch and pin it. Sew a generous 1/4″ from the edge (I reinforced the seam with a zig zag as well)

Do this with all four corners.
Now for the fun part. Leave your outer shell piece inside out. Turn the lining right side out. Place the lining inside the outer shell. Place pins around the outside, remembering to leave a 3-4″ gap (on the opposite side to the button!) to pull it all through in the end.

Sew about 1/2″ from the edge, leaving your gap. Pull lining and outer shell through the gap. Stuff the lining inside of the outer shell.

Pin a piece of elastic (I used a {new} hair elastic) into middle of the gap, and tuck the raw edges in. Pin. Top stitch around about 1/8″ from the edge.

Now, Voila! You have a finished lunch sack all ready to be wrapped up for Christmas! Yay, you!


0 comments:
Post a Comment