
I have decided to ignore the fact that it's getting a little late in the summer, and I am going to do a tutorial on how to make a VERY SIMPLE laminated cotton beach bag, in two sizes!
I know that some of you like a really BIG beach tote, and some of you would rather carry something a little smaller. Therefore I have suggested two sizes for the bag I am going to make. But you can make it any size you want!
Finished sizes:
Small: 20" wide at the top, 14" tall, with a 6" bottom depth
Holds two big beach towels easily, among other items.
Large: 26" wide at the top, 16" tall, with a 6" bottom depth
Holds 4 big beach towels easily, among other items.
Front pocket is optional.

Keep in mind that you can make your own laminated straps, or you can opt for webbing straps that you can buy at your local fabric store by the yard. Obviously the webbing option is faster and easier. But then you only have a few color options, so it's a bit of a toss-up. I will include instructions for both.

You may notice that the strap method here is a little unconventional. This is because turning a laminate strap will likely drive one nuts. I created this method to save you unladylike fits of rage as well as unnecessary hair loss.
I am using some of my "Bohemian Festival" laminates for these bags.

I LOVE laminated bags for so many reasons, but of course you can also use regular quilting cotton or maybe some home decor weight or twill or denim for a more substantial bag.
Speaking of substance, I am including fusible fleece (bolt end photo below) in the instructions because I like how substantial it makes the laminated cotton bag, but it is optional. You should determine for yourself how flexible/flimsy or substantial/sturdy you like your bags to be. If you are using regular quilting cotton, I suggest using the fusible fleece. Either way, you will still need fusible fleece for the laminated strap option.
Note: for the large bag I fused fleece to both the outer and the lining layers of fabric.

Another note about substance...I like to put something substantial in the base of my bag to keep it from being too saggy in the bottom. (Heaven forbid our bottoms are saggy;) There are different things you could use for this, and one that I rather like is plastic canvas, (photo below, as it looks in my local store on the rack) which is typically used for needlepoint.

It is a heavyweight but flexible plastic mesh that is inexpensive and can be cut to almost any size. You can find it at most chain fabric/craft stores. There are different sizes and weights...choose the one you like best.
It is placed in the bottom of the bag between the exterior and the lining layers, and can be stitched or hot glued into place. Of course you can use whatever you want, or use nothing at all. But be aware that without it your bottom will be...well you know:)

If you have scraps of this, you can piece them together with your machine really easily to get the length you want.

A word about needles: These are the needles that I use with laminates. They sew more smoothly through the coating than normal needles do.

And you might want to use these tools to make this project much easier.

If you are using laminated cotton for the first time, check out these TIPS.

OK. Now let's get started!
Materials:
(extra yardage needed for directional prints)
Small Bag: (20" X 14" X 6")
2/3 yd. 44" laminated fabric for outer bag
2/3 yd. 44" laminated fabric for lining
2/3 yd. fusible fleece (optional for bag body)
1/3 yard more laminated fabric for laminate strap option
1/3 yard more fusible fleece for laminate strap option
OR 54" of webbing for straps (optional)
1 sheet plastic canvas (or a piece approx. 6" X 14")
quality thread
sharp machine needle size 80/12
press cloth (see TIPS)
Hot glue gun and glue (optional)
Large Bag: (26" X 15" X 8")
1 5/8yd. 44" laminated fabric for outer bag
1 5/8yd. 44" laminated fabric for lining
2 1/2 yds. fusible fleece (optional for bag body and lining)
1 lg. sheet plastic canvas (or a piece approx. 6" X 20". Canvas can be pieced)
1/3 yard more Fusible fleece for laminate strap option
OR 54" of webbing for straps (optional)
quality thread
sharp machine needle size 80/12
press cloth (see TIPS)
Hot glue gun and glue (optional)
Cutting:
for Small Bag:
CUT
*4 rectangles, 21"Wide x 18"High: two for the outer bag, and two for the lining
*2 long strips for the straps, 27" X 5" (finished strap is 2" wide)
*2 fusible fleece rectangles 21" X 18" (optional)
*2 long fusible fleece strips for straps: 27" X 4 1/2"
OR cut 2- 27" straps from webbing
*4 rectangles, 8"W X 6"H from lining fabric (makes two inside pockets)
*One 6" X 13 1/2" rectangle from plastic canvas. Round the corners slightly with your scissors.
for Large Bag:
CUT
*4 rectangles, 27"Wide X 20"High: two for the outside, and two for the lining
*2 long strips for the straps, 27" X 5"
*4 (optional) fusible fleece rectangles 27" X 20"
*2 long fusible fleece strips for straps: 27" X 4 1/2"
OR cut 2- 27" straps from webbing
*4 rectangles, 12"W X 6"H from lining fabric (makes two double inside pockets)
*2 rectangles 10"H X 8"W for outer body pocket (optional)
*One 6" X 20" rectangle from plastic canvas. (Piece this if necessary) Round the corners slightly with your scissors.
Sewing instructions For Either Size:
SA= Seam Allowance (1/4" unless otherwise noted)
RSF= Right Sides Facing each other
Step1. FUSING:
Place one body fleece piece on your ironing board, with fusible (rough) side up. Lay one outer fabric piece right side up, on top of the fleece. Using a press cloth and your hot steam iron, fuse (the back side of) the fabric to the fleece one section at a time.

Make sure edges and corners are stuck down. Tip: Make a LONG skip-stitch with your machine all around the edges (1/8" SA) after fusing to keep the fleece from shifting.
Repeat fusing with the other outer bag piece.
Note: If making the large bag, fuse fleece to lining pieces as well.
Step 2. STRAPS: (if you are not using webbing)
Lay fleece strip horizontally on ironing board with fusible side up. Align fabric strap piece on batting strip to the lower raw edge. Use the press cloth and fuse all the way down.

Flip strap over.

Fold the flush edge of strap/batting piece toward the center (fleece to fleece) 1 ¼”. Pin all the way down.

On the other edge, the fabric extends ½” beyond the batting. Fold that ½” over the edge of the batting. Now fold that side toward the center, overlapping the raw edge by about ¼”. Make sure the finished width is uniformly 2”. Pin all the way down.
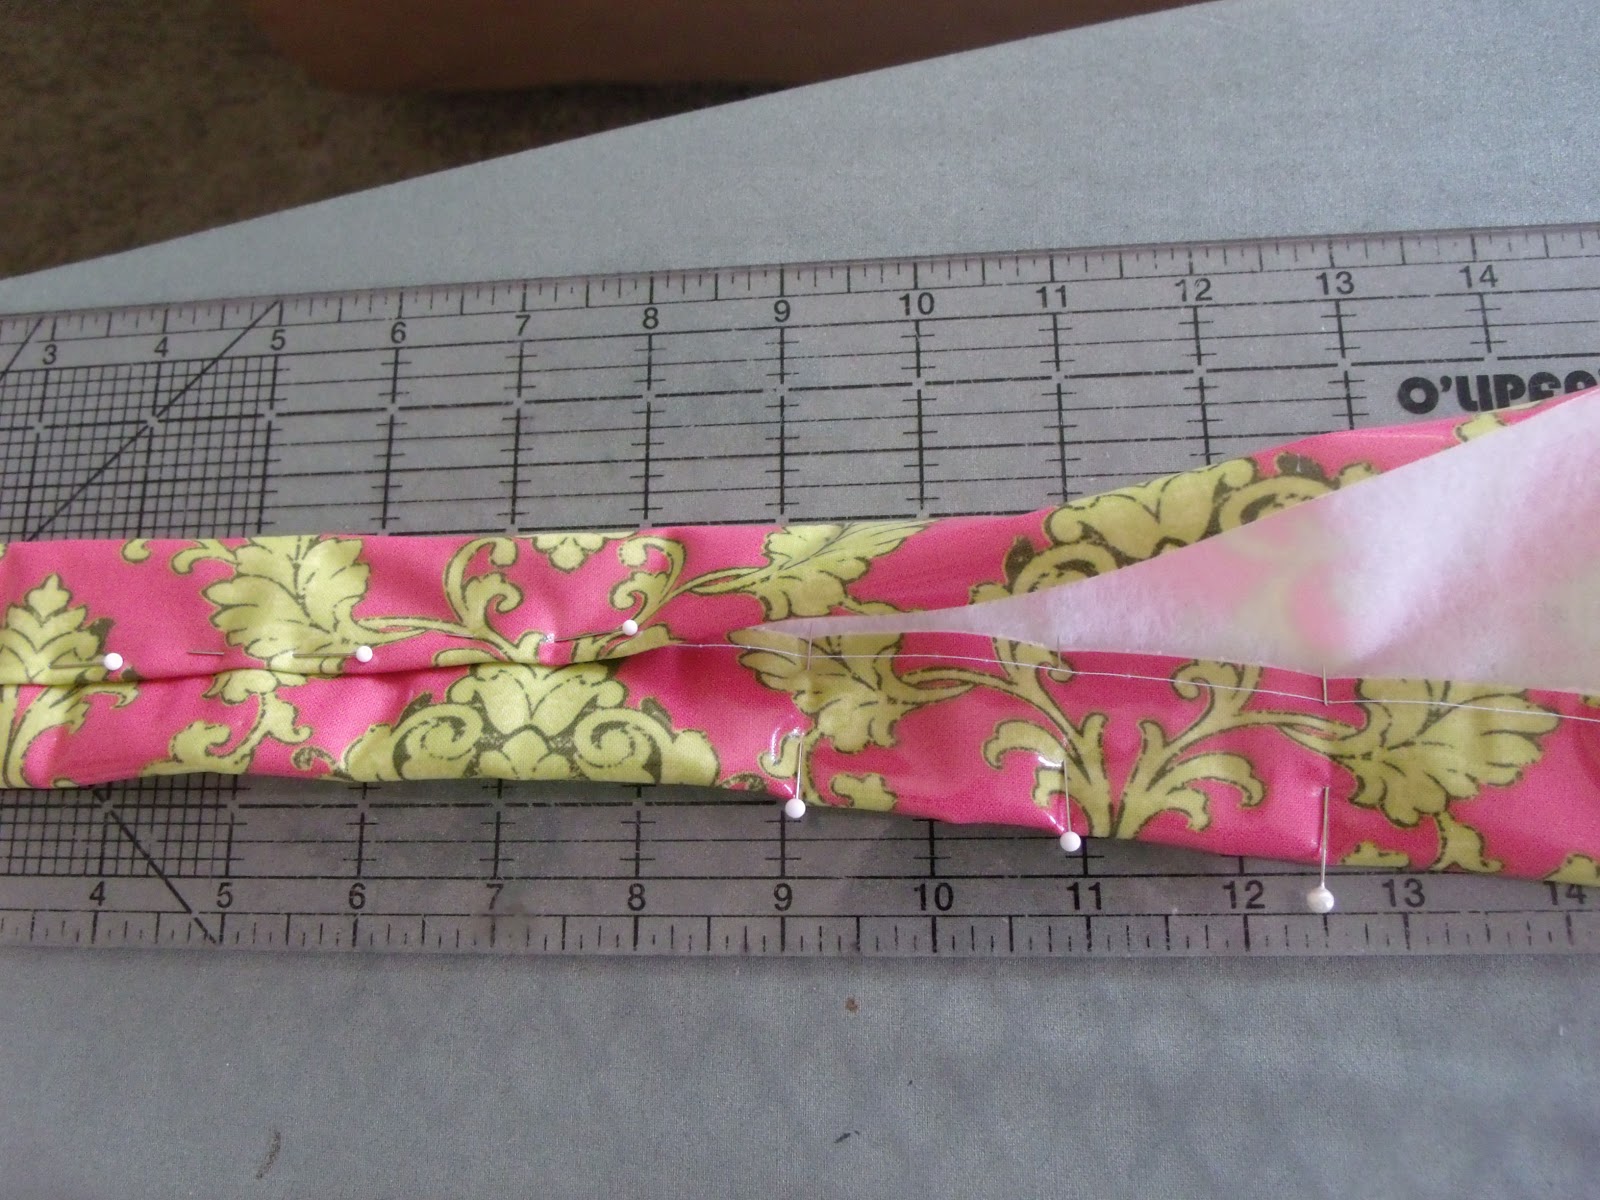
Stitch down the center through all layers.

Step 3. INSIDE POCKETS:
Place two inside pocket pieces together RSF, and stitch around the perimeter, leaving a 2" opening for turning. Trim across corners diagonally.

Turn right side out, pushing corners all the way out, and press neatly. (don't forget the press cloth!)

Choose one side to be the top of the pocket, (not the side with the opening) and top-stitch along that edge in a 1/2" SA.
Repeat with the other two inside pocket pieces. Now you have two pockets.

Step 4. POCKET PLACEMENT:
Lay one lining body piece out right side up, with longer edges at the top and bottom. Center one pocket 3" down from top edge of the lining, (4" down for large bag) and equally distant from each side. Make sure top-stitched edge of pocket is up towards the top of the lining. Pin.

Top-stitch the pocket into place (just the three sides) in a 1/8" to 1/4" SA.

For the large bag inside pocket: Stitch down the center of pocket as well, to divide pocket into halves. Reinforce pocket stitching at beginning and ending points.
Repeat with the other pocket on the other lining piece.
Step 5. LINING:
Lay the two pocketed lining pieces together RSF, making sure pockets are both facing the same direction. Align sides and bottom. Pin. Stitch sides and across bottom in a 3/8" SA.

Step 6. BOXING CORNERS:
While still wrong side out, open lining side panels out away from each other, and fold the bottom seam inward. Bring the two side seams together forming points. Keep seams aligned.


Using a ruler, draw a line across one point where it measures 6" across. Pin to hold point in place.


Stitch along your drawn line. Trim away the excess at the point, 1/4" from stitching line.

Repeat with the other point. Now you should have a neatly boxed bottom. Turn lining right side out.
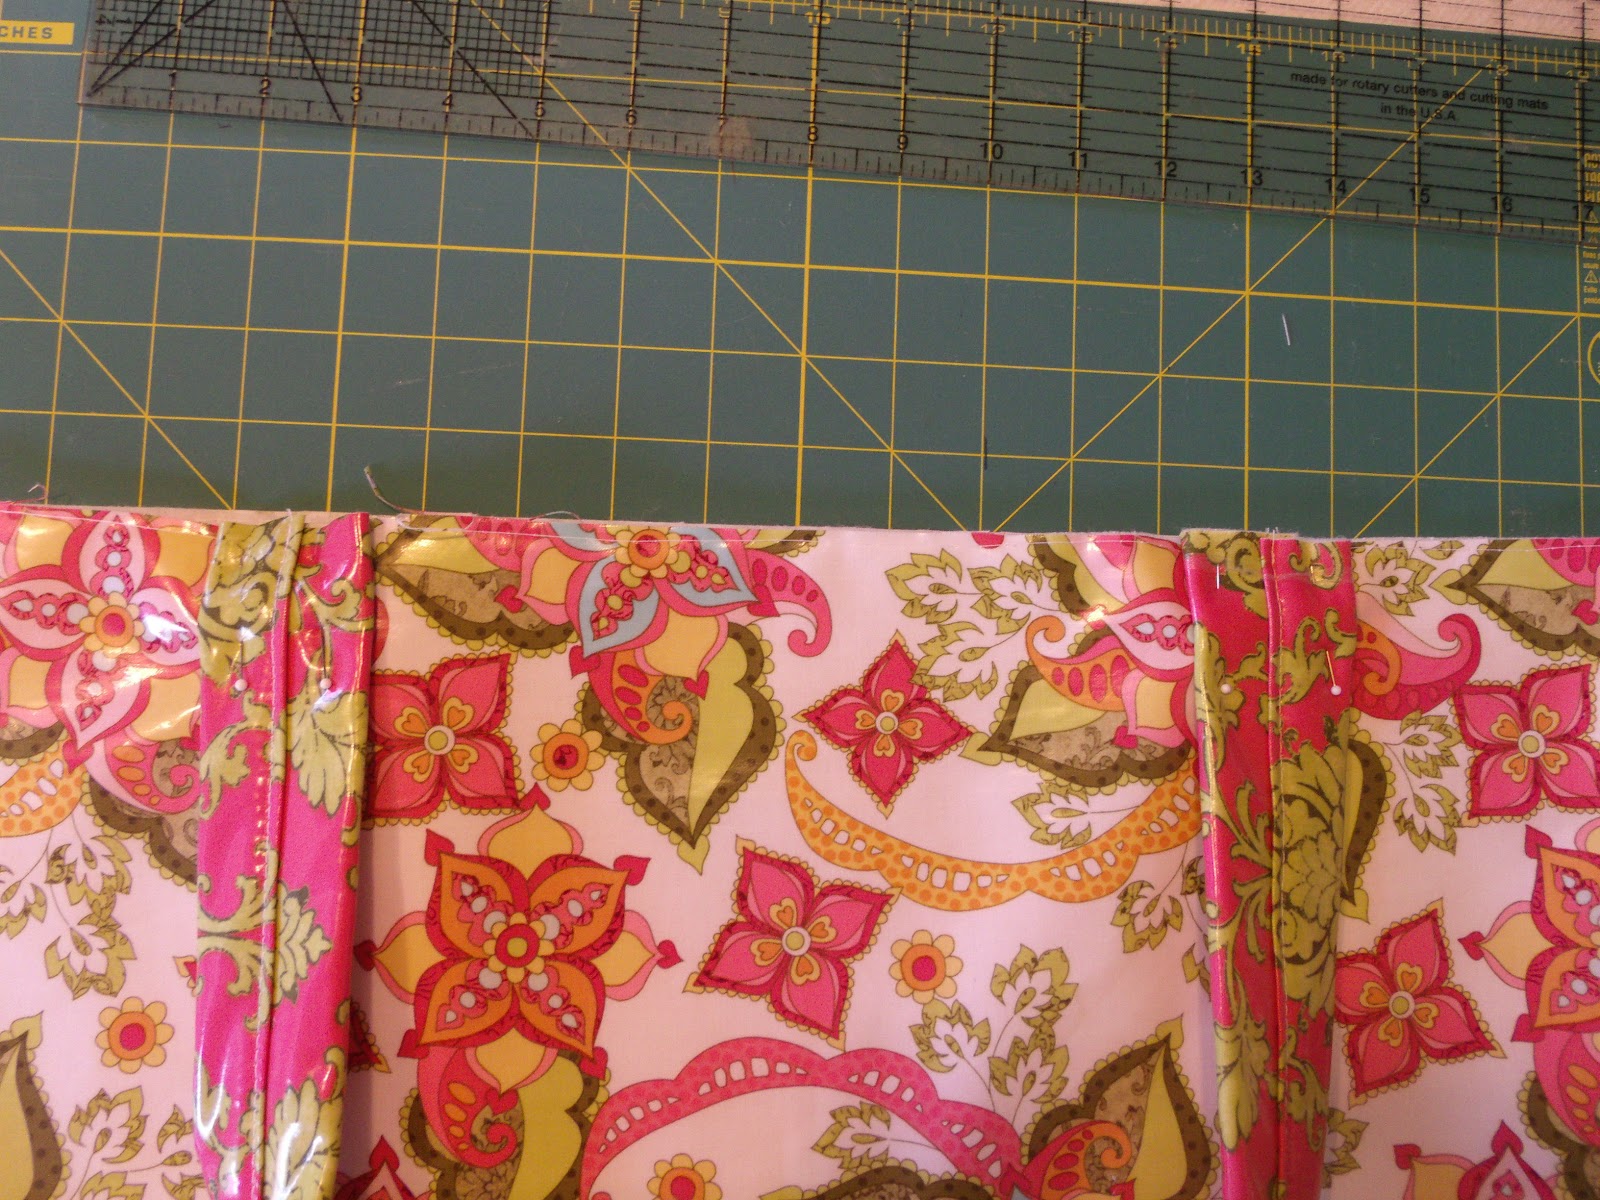
Step 7. OPTIONAL OUTER BAG POCKET:
Follow step 3 for making the outer pocket as you did for the inside pockets.
Lay one outer bag piece out right side up, with longer edges at the top and bottom. Center the outer pocket 5" down from the top edge, and equally distant from each side. Make sure top-stitched edge of pocket is up towards the top of the lining. Pin. Top-stitch the pocket into place (just the three sides) in a 1/8" to 1/4" SA. Top stitch again 1/4" away from first stitching.

Step 8. OUTER BAG:
Lay the two outer bag pieces together RSF, aligning shorter sides, and bottom. Pin. Stitch sides and bottom in a 1/4" SA.
Follow step 6 to box the bottom of the outer bag in the same manner as the lining. Turn right side out.
Step 9. ATTACHING STRAPS:
(For Webbing Straps: Cut two 27" straps and follow directions below for placement.)
Place the ends of one strap at the top raw edge of the outer bag, about 4" from each of the side seams. (7 1/2" for the large bag)
Make sure strap is not twisted. Stitch strap ends into place 1/2" and again 1/4" from raw edge. Stitch again to reinforce.
Repeat with the other strap on the other side of the outer bag.
Step 10. BOTTOM REINFORCEMENT:
While outer bag is still right side out, slip the plastic canvas piece into the bottom of the bag. (It helps if you finger-press the center bottom seam to one side.)

Using your hot glue gun, drizzle a little glue into the corners and along center seam to secure the canvas to the bottom of the inside of the bag. You can also secure it using needle and thread if you would rather. Once the glue is totally dry, turn the outer bag wrong side out.
Step 11. FINISHING:
Slip the lining into the outer bag RSF. Align the top raw edges, and pin, laying side seams in opposite directions to reduce bulk. Stitch the perimeter of the top edge in a 1/2" SA, leaving a 6" opening for turning.

Pull everything out through the opening carefully,

and then stuff the lining down into the outer bag.

Work the seam you just made to the top neatly, and smooth out the lining into the inner corners of the bag. Top stitch the perimeter of the bag in a 1/8" SA,

and again in a 3/8" SA, being sure SA of opening is tucked into the seam neatly.


Enjoy!!


Hey :o) - had a customer coming into the shop yesterday, saying that she saw this great free tutorial on an American blog for beach bags from laminated cotton - and do I by any chance have such... Isn't that neat?
ReplyDeleteThanks for the terrific tutorial! I love the clear pictures and great directions. Can't wait to make one!
ReplyDelete