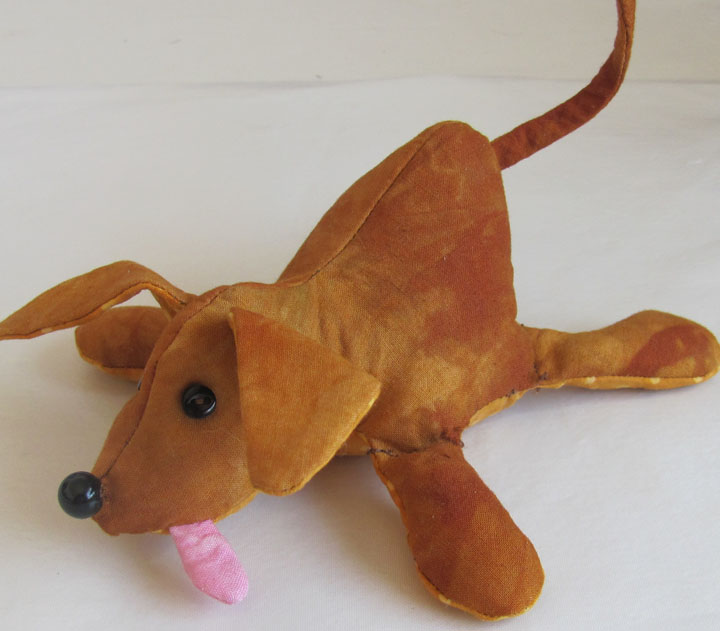
DIY Dog Pincushion Tutorial. I have done two versions. One with a long snout, short tail and short ears. The other with a short snout, long tail and long ears. What fun it would be to mix and match.
8" x 16" Fabric for Body, Ears & Tail
8" x 8" Fabric for Belly, Inside Ears
1 1/2" Pink Fabric Scrap for Tongue
1/2 Yard Light Weight Fusible Woven Interfacing
2 Black Baby Buttons for Eyes
1 Small Black Shank Button for nose
Threads to match fabrics
Favorite template Material (ie: template plastic)
Washout pen or pencil for marking
1/2 Pound Crushed Walnut shells for stuffing or favorite stuffing
Tail: Stitch on drawn line for the tail, leaving bottom straight edge open.* Turn tail right side out.
Pin tail between body fabrics at extending the drawn line about 1/4", pin in place. Sew on line around nose and top of body to dogs bottom. Make sure to sew through tail.* Cut out 1/8" from drawn lines after sewing body top.
Tongue: Trace tongue pattern onto wrong side of prepared doubled tongue fabric. Sew on drawn line.*
Cut out using 1/8" seam allowance, except at bottom. At bottom leave 1/4". Turn right side out. Place
tongue to dog’s nose, extending past raw edge. Make sure the tongue is facing inside. Pin in place through single layer.
Cut out dog’s belly using a 1/8" seam allowance. Pin belly to body matching nose, legs and centering back.
Repin tongue through all layers. Sewing from belly side sew on drawn line, making sure to not catch upper body.
Leave a 1/2" opening on one side between legs.* Turn right side out.
Stuff one let at a time leaving 1/2" from top of leg free of stuffing. Pin leg at top to temporarily close leg. Repeat for the other 3 legs. Using a zipper foot, top stitch legs where marked on pattern.
Stuff dog’s body firmly. Hand sew opening closed.
Ears: Layer drawn ears over prepared body fabric, pin. This will make the inside of the ears the belly fabric and the out side the body fabric. Sew on drawn line leaving 1/2" opening in bottom of each ear. Turn right side out. Hand sew to top of head curving ear slightly. This will make the ears more dimensional.
Eyes and Nose: Using a long needle, doubled long thread, sew eyes in place on dog’s face. Hide the knot behind the first button. Pull thread snugly will create a small indentation for the eyes. Knot off behind a button.
Pull thread end into head and cut off.
Extra pattern: Give a dog a bone
Prepare fabric by following the manufacturers instructions to attach fusible interfacing to the wrong side of fabric.
Trace pattern template onto wrong side of fabric.
Sew on drawn line, leaving 1/2" opening in side. Turn rightside out. Stuff firmly and sew opening closed.


So cute!
ReplyDelete